
Uneven flooring can be a major inconvenience and even a safety hazard in your home. Instead of enjoying a smooth and level surface, you find yourself navigating dips and slopes as you walk through your space. Not only is this frustrating, but it can also be dangerous.
In this discussion, we will identify the causes of uneven floors, the tools you’ll need for repair, and some preventive measures you can take to ensure a stable foundation.
By addressing this problem head-on, you can transform your uneven flooring into a safe and level surface that enhances the overall aesthetics of your home.
Identifying Uneven Flooring
To identify uneven flooring in your home, simply walk around and feel for any noticeable slopes or dips under your feet. This is an important step in assessing the stability of your floor and determining if any repairs are necessary. As you walk, pay attention to areas where your feet seem to sink or where there’s a noticeable change in height. These uneven surfaces can indicate underlying issues that need to be addressed.
Once you have identified the areas with uneven flooring, it’s important to evaluate your options for DIY repairs. Depending on the severity of the problem, you may be able to fix it yourself using basic tools and materials. However, it’s crucial to understand your skills and limitations. Some floor stability issues may require professional assistance to ensure a proper and long-lasting repair.

Before attempting any repairs, consider the cause of the uneven flooring. It could be due to the natural settling of the house over time, moisture damage, or even structural issues. Understanding the root cause will help you determine the best course of action.
If the unevenness is minimal and caused by minor settling, you may be able to use self-leveling compounds or floor patching materials to even out the surface. However, if the problem is more significant, such as structural damage, it’s recommended to consult with a professional contractor or engineer. They’ll be able to assess the situation and provide appropriate solutions.
Assessing the Severity of the Issue
To assess the severity of the issue, start by visually inspecting the floor for any noticeable unevenness. Walk around the room and pay attention to areas where the floor feels uneven or slopes downwards. For a more accurate measurement, use a level tool. Place the level on the floor and check if it’s level or if it tilts in any direction. This will give you an idea of the severity of the problem.
Here is a table that outlines different levels of slope or dip in the flooring and their corresponding severity:
- Mild: 1-2 degrees – Slight unevenness that may not be easily noticeable.
- Moderate: 3-5 degrees – Noticeable unevenness that affects the aesthetics.
- Severe: 6-10 degrees – Significant slope or dip that can impact the functionality of the room.
- Critical: >10 degrees – Extreme slope or dip that poses safety hazards and requires immediate attention.
Assessing the severity of the issue is crucial in determining the appropriate solutions. Mild to moderate slopes or dips can often be resolved through simple DIY methods such as using self-leveling compounds or shims. However, severe or critical slopes may require professional assistance and more extensive repair work.

Accurately assessing the severity of the issue will help you identify the most suitable solutions and take the necessary steps to restore the evenness and stability of your flooring.
Common Causes of Uneven Floors
Uneven floors can be caused by several common factors. It’s important to understand these causes in order to address the issue effectively and create a safe living environment. Here are four common causes of uneven floors:
- Foundation problems: One common cause of uneven floors is a damaged or settling foundation. This can occur due to soil movement, poor construction practices, or water damage. Signs of foundation issues include cracks in the walls, doors or windows that stick, or floors that slope.
- Subfloor issues: Problems with the subfloor can also lead to unevenness. Moisture damage, rotting wood, or improper installation can all contribute to an uneven surface. Signs of subfloor issues include sagging or bouncing floors, squeaking noises, or visible gaps between the floorboards.
- Plumbing leaks: Leaking pipes can cause water to seep into the subfloor, weakening the structure and causing it to warp or buckle. It’s important to look for signs of water damage, such as mold or mildew, musty smells, or discolored flooring.
- Poor installation or wear and tear: Over time, flooring materials can become worn or damaged, resulting in an uneven surface. Additionally, if the flooring wasn’t properly installed, it can lead to unevenness. Signs of poor installation or wear and tear include loose or damaged tiles, creaking or shifting floorboards, or uneven transitions between different flooring materials.
Tools Needed for Repairing Uneven Flooring
When repairing uneven flooring, it’s crucial to have the right tools for the job. The proper tools can make a huge difference in ensuring a successful DIY floor repair. Let’s discuss the essential tools you’ll need for this task.
First and foremost, you’ll need a leveling compound. This self-leveling material is essential for smoothing out any uneven areas on your floor. It’s important to choose a high-quality leveling compound that’s suitable for your specific type of flooring. Be sure to carefully follow the manufacturer’s instructions when applying it.
Next, you’ll need a trowel or a floor scraper. These tools will help you remove any existing flooring or adhesive that may be causing the unevenness. A trowel is perfect for spreading the leveling compound evenly, while a floor scraper comes in handy for removing any stubborn residue.

A leveling tool, such as a laser level or a straightedge, is also essential. This tool will help you determine the level of your floor and identify any high or low spots that need to be addressed. For more accurate measurements, it’s recommended to use a laser level.
Lastly, don’t forget about safety equipment. It’s important to protect yourself during the repair process. Make sure to wear safety goggles, gloves, and a dust mask to keep your eyes, hands, and lungs safe from any potential hazards.
Preparing the Floor for Repair
To properly prepare the floor for repair, start by assessing the condition of the existing flooring and determining the extent of the unevenness. Here are the steps to follow in prepping the surface before applying floor leveling compounds:
- Clear the area: Remove any furniture or obstacles that might get in the way of your work. This will give you a clear space to assess the floor and work comfortably.
- Clean the floor: Sweep away any dirt, debris, or loose materials from the surface. A clean floor will ensure proper adhesion of the leveling compound and a smooth repair.
- Fill in gaps and cracks: Use a suitable filler to repair any gaps or cracks in the floor. This will help create a solid and even surface for the leveling compound to adhere to.
- Prime the surface: Apply a primer to the floor to improve the adhesion of the leveling compound. The primer will also seal the surface and prevent moisture from affecting the repair.
Once you have completed these steps, you’re ready to apply the floor leveling compound. This compound is designed to even out the surface and provide a stable foundation for the new flooring. Follow the manufacturer’s instructions for mixing and application, and make sure to spread the compound evenly across the entire floor.
Leveling Techniques for Uneven Floors
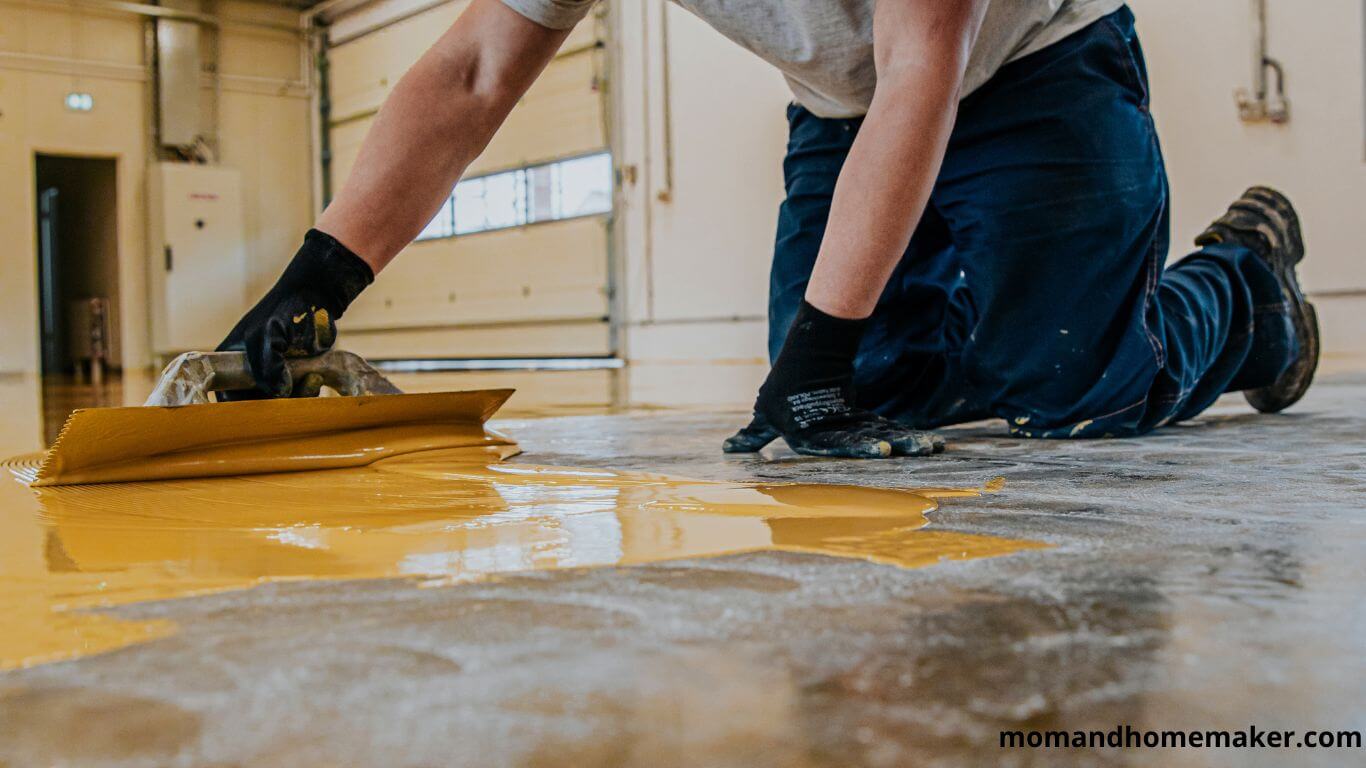
Uneven floors can be leveled using a variety of techniques and materials. One popular method is to use a leveling compound. This involves applying a self-leveling compound to the uneven areas of the floor, which fills in the gaps and raises the lower areas to match the higher spots. The result is a smooth and seamless surface.

To get started with DIY floor leveling, begin by cleaning and preparing the floor. Remove any loose debris or dirt to ensure proper adhesion of the leveling compound. Then, mix the leveling compound according to the manufacturer’s instructions. Once mixed, pour the mixture onto the uneven areas of the floor and use a trowel or screed to spread it evenly. Be sure to follow the drying time instructions provided by the manufacturer.
Another technique for leveling uneven floors is to use plywood or shims. This method involves adding layers of plywood or shims to the lower areas of the floor to bring them up to the same level as the higher spots. This is particularly useful for small, localized areas of unevenness.
Before using any leveling technique, it’s important to identify the cause of the unevenness and address it if possible. Uneven floors can be caused by issues such as the settling of the foundation or faulty installation. By addressing the underlying issue, you can prevent future problems and ensure a long-lasting, level floor.
Patching Small Cracks and Holes
If you have small cracks and holes in your flooring, don’t worry! It’s a common issue that can be easily fixed. Whether you’re dealing with cracks in concrete or holes in wood, here are some simple steps to help you patch them up and restore the beauty of your floors.
- Repairing Concrete Cracks:
To start, clean the crack with a wire brush to remove any loose debris and dust. This will ensure that the patching compound adheres properly. Next, apply a concrete patching compound using a putty knife. Make sure to fill the crack and smooth out the surface with the putty knife. It’s important to level the patch with the surrounding flooring for a seamless finish. Allow the patch to dry and cure according to the manufacturer’s instructions before walking on it.
- Filling Wood Holes:
To fix wood holes, begin by cleaning out the hole using a chisel or scraper. This will remove any loose wood chips or debris that could interfere with the filler. Next, apply a wood filler or putty that matches the color of your flooring. Use a putty knife to push the filler into the hole, ensuring it’s filled. Smooth out the surface and remove any excess filler with the putty knife. Allow the filler to dry and harden, then sand it down until it’s flush with the surrounding wood.
Filling Gaps in Hardwood Floors
Filling gaps in hardwood floors is an important part of maintaining their appearance and preventing further damage. To get started, gather the necessary materials, including a wood filler that matches your floor’s color and a putty knife or spatula for application.
Before you apply the filler, make sure to thoroughly clean the gaps. Use a vacuum or small brush to remove any dust, debris, or loose particles. This will ensure better adhesion and a more durable repair.
Once the gaps are clean, take a small amount of wood filler and use the putty knife or spatula to apply it to the gaps. Press the filler firmly into the gaps and smooth it out for an even surface. Any excess filler can be removed with a damp cloth or scraper.
After filling the gaps, allow the filler to dry completely according to the manufacturer’s instructions. Once dry, lightly sand the filled areas to achieve a smooth finish.
Repairing Subfloor Issues
When it comes to repairing subfloor issues, it’s important to first assess the extent of the damage and determine the underlying cause. This will help you decide whether you can handle the repairs yourself or if you should hire a professional.
Here are some important points to consider when reinforcing a subfloor and making the choice between DIY repairs and professional assistance.
- Assess the damage: Take a close look at the subfloor to determine how extensive the damage is. Look for signs of sagging, rot, or unevenness. This will give you a better understanding of the repairs that will be needed.
- Identify the cause: It’s crucial to understand what caused the subfloor issues in the first place. It could be due to water damage, termite infestation, or structural problems. Identifying the cause will help you address the root issue and prevent further damage.
- DIY repairs: If the damage is minor and you have some experience with home repairs, you may be able to tackle the subfloor repairs yourself. This can save you money and give you a sense of accomplishment. Just make sure you have the right tools and materials, as well as a good understanding of the repair process.
- Professional repairs: For extensive subfloor damage or if you’re unsure about your DIY skills, it’s best to hire a professional. They have the expertise, experience, and tools necessary to handle the repairs efficiently and effectively. They can also ensure that the subfloor is properly reinforced and safe for use.
Fixing Uneven Tile Floors
Once you have assessed the extent of the damage and reinforced the subfloor, the next step is to address the issues with the tile floors. By fixing sloping tiles and repairing uneven grout lines, you can greatly improve the appearance and functionality of your tiled floors. Here are the steps you can follow to fix these problems and achieve a smooth and level tile surface.
- Inspect the tiles and identify the areas that are sloping. This will help you determine which tiles need to be removed and replaced.
- Use a chisel and hammer to carefully remove the sloping tiles. Be sure to wear safety goggles and work carefully to avoid damaging the surrounding tiles.
- Clean the area thoroughly and remove any debris or old adhesive. This will ensure a clean and smooth base for the new tiles.
- Apply a leveling compound to the subfloor to fill in any gaps or uneven areas. This will help create a level surface for the new tiles to adhere to. You can use an adhesive remover to clean the subfloor before applying the leveling compound.
- Use a trowel to spread the leveling compound evenly across the subfloor. Make sure to follow the manufacturer’s instructions for the proper application and drying time.
- Allow the leveling compound to dry completely before moving on to the next step. This may take several hours or overnight, depending on the product you’re using.
- Once the leveling compound is dry, you can begin installing new tiles in the repaired areas. Make sure to use replacement tiles that match the size and style of the existing tiles.
- Apply tile adhesive to the back of the new tiles and press them firmly into place. Use a level to ensure that the new tiles are properly aligned and level with the surrounding tiles.
- Allow the adhesive to dry completely before grouting the tiles. This will ensure a strong and durable bond between the tiles and the subfloor.
- Finally, apply grout to the gaps between the tiles using a grout float. Wipe away any excess grout with a damp sponge, and allow the grout to dry completely before using the tiled area.
Addressing Uneven Laminate Flooring
Uneven laminate flooring can be addressed by leveling the subfloor and replacing any damaged or uneven planks.
Laminate flooring is a popular choice for homeowners because it’s durable and affordable. However, over time, it can develop issues like buckling or warping, which can make the floor uneven and unattractive. To fix these problems, follow these steps:
First, assess the condition of your laminate flooring. Look for signs of wear and tear, such as scratches or fading. If the laminate is heavily damaged or nearing the end of its lifespan, it may be more cost-effective to replace the entire floor instead of trying to fix the unevenness.
If the laminate flooring is experiencing buckling, which is when the planks lift and create gaps, address this issue first. Remove the baseboards around the affected area and gently lift the planks using a pry bar or putty knife. Apply adhesive to the subfloor and press the planks back down, making sure they’re aligned properly. Allow the adhesive to dry completely before reinstalling the baseboards.
Next, check the subfloor for unevenness. Use a level to identify any high or low spots. To level the subfloor, you may need to use a self-leveling compound or plywood underlayment. Follow the manufacturer’s instructions for proper installation.
If any of the laminate planks are damaged or uneven, it’s important to replace them. Carefully remove the damaged planks using a circular saw or laminate flooring cutter. Install the new planks according to the manufacturer’s instructions, ensuring they fit snugly together.
Adjusting Uneven Carpeting
Uneven carpeting can be a hassle, causing discomfort and potential tripping hazards. To fix this issue, start by assessing the condition of the carpet and identifying the areas that are causing the unevenness.
One common cause is the padding underneath. Over time, the padding can become compressed or worn out, resulting in an uneven surface. To address this, remove the carpet from the affected area and check the condition of the padding.
If it’s compressed or damaged, replacing it is necessary. Measure the dimensions of the area and purchase new padding that matches the thickness of the existing one. Carefully install the new padding, ensuring it covers the entire area evenly.
Another cause of uneven carpeting is damaged carpet. If you notice tears, rips, or frayed edges, it’s important to replace the damaged sections. Use a carpet knife or scissors to cut out the damaged portion, being careful not to damage the underlying padding.
Measure the area and cut a new piece of carpet to fit. Secure the new carpet in place using carpet tape or adhesive, making sure it blends seamlessly with the surrounding carpet.
Dealing With Uneven Concrete Floors
Dealing with uneven concrete floors can be a challenge, but with the right approach, you can achieve a level and stable surface that will make your home feel more comfortable and inviting. Here are four steps to help you tackle this task:
- Prepare the surface: Before making any adjustments, start by thoroughly cleaning the concrete. Use a broom or vacuum to remove any dirt, debris, or loose material. This will ensure that the new flooring adheres properly and minimizes the risk of future issues.
- Level the floor: To address any low spots or uneven areas, use a self-leveling compound. Mix the compound according to the manufacturer’s instructions, then pour it onto the floor and spread it evenly using a trowel or squeegee. Allow it to dry completely before moving on to the next step.
- Install underlayment: Enhance the stability of your flooring by installing an underlayment. This material absorbs minor imperfections and provides additional support. Choose an underlayment that’s suitable for your specific flooring type and follow the manufacturer’s instructions for installation.
- Lay the vinyl flooring: Now it’s time to lay your vinyl flooring. Start by measuring and cutting the vinyl to fit the space. Apply adhesive according to the manufacturer’s instructions and carefully lay the vinyl, smoothing out any bubbles or wrinkles as you go. Once the flooring is installed, use a roller to ensure a secure bond with the underlayment and concrete surface.
Preventive Measures for Future Floor Issues
To prevent future floor issues and ensure the long-term stability and durability of your flooring, it’s important to take proactive steps. By following a few maintenance tips, you can maintain a smooth and level surface for years to come.
Firstly, keep your floors clean and free from debris. Regularly sweep or vacuum to prevent dirt and dust buildup, which can lead to unevenness over time. Also, be cautious when moving heavy furniture or appliances across the floor. Use furniture pads or sliders to minimize the risk of causing dents or scratches that can disrupt the evenness of the surface.
Moisture is a common culprit in floor problems, so it’s essential to address any water leaks or spills promptly. Water damage can cause the floorboards to swell or warp, resulting in an uneven surface. Consider using floor mats or rugs in areas prone to moisture, such as entryways or kitchens, to protect the floor and minimize the risk of damage.
Regularly inspecting your flooring is another important preventive measure. Look for signs of wear and tear, including cracks, gaps, or loose tiles, and address them promptly. Ignoring these issues can lead to further damage and unevenness.
Scheduling professional inspections and maintenance for your flooring every few years can help identify and address any potential problems before they worsen.
Hiring a Professional for Complex Repairs
For the best results when it comes to complex repairs, it’s recommended to hire a professional who specializes in addressing flooring issues. While it may be tempting to try DIY options, hiring professionals for uneven flooring repairs is a wise choice. Here’s why:
- Experience and Expertise: Professionals have years of experience and extensive knowledge in dealing with various flooring problems. They have the skills to accurately diagnose the root cause of the uneven flooring and provide effective solutions.
- Specialized Equipment: Complex repairs often require specialized equipment that professionals have access to. From leveling compounds and floor grinders to moisture meters and laser levels, professionals have the right tools to ensure precise and accurate repairs.
- Time and Effort: Undertaking complex repairs on your own can be time-consuming and labor-intensive. Hiring professionals saves you the hassle and allows you to focus on other important tasks while they efficiently handle the repair process.
- Guaranteed Results: Professionals take pride in their work and strive to deliver exceptional results. They stand behind their craftsmanship and often provide warranties on their services, giving you peace of mind that the repair work will be done to the highest standards.
While there are DIY options available for uneven flooring repairs, it’s important to consider the complexity of the issue and the potential risks involved. Hiring professionals ensures that your flooring is repaired correctly, avoiding further damage and ensuring a safe and long-lasting solution. Leave the complex repairs to the experts and enjoy a beautifully leveled and stable floor in your home.
Conclusion
Homeowners should consider consulting with professionals or undertaking necessary repairs to fix uneven flooring, as it can also affect the value of the property.
Taking proactive measures to address uneven flooring can enhance the overall safety and aesthetics of the home.
