

As the days get longer and the weather warms up, it’s time to give our outdoor spaces and gardens a good cleaning. This seasonal task is important to ensure that everything is in top shape for the months ahead.
From removing debris to scrubbing outdoor furniture, there are several tasks to tackle. But don’t worry, we’ve got you covered with these helpful tips and techniques.

Clearing Out Debris
To clear out debris from outdoor spaces and gardens, I use gloves and a sturdy rake. It’s important to stay on top of clearing fallen leaves to keep your outdoor areas looking neat and tidy. This not only maintains the aesthetic appeal but also prevents potential hazards like slippery surfaces. I find it satisfying to gather the fallen leaves into piles and dispose of them properly.
In addition to clearing leaves, organizing outdoor storage is crucial for maintaining a tidy outdoor space. Storage containers and sheds can quickly become cluttered with tools, pots, and other items. By taking the time to declutter and organize these spaces, you’ll create a visually appealing environment and make it easier to find items when you’re working in your garden.
When it comes to clearing fallen leaves, a good strategy is to rake them into piles. This makes the task more manageable and allows for easy disposal. Once you have a pile, you can either bag the leaves or add them to a compost pile. Composting is a great way to reduce waste and create nutrient-rich soil for your garden.
For organizing outdoor storage, consider investing in shelves, hooks, and bins. These storage solutions maximize space and keep things organized. It’s also helpful to label containers and shelves for easy access to your items. By clearing out debris and organizing outdoor storage, you’ll create a sense of order and belonging in your outdoor space.
Pruning Overgrown Plants
When my outdoor plants become overgrown, I use sharp pruning shears to trim them back and keep them healthy and attractive. Pruning is important for rejuvenating plants and ensuring their long-term survival. Overgrown plants can become weak, diseased, and unsightly, so it’s crucial to trim them to promote new growth, improve their shape, and prevent potential damage.
To effectively prune overgrown plants, I first identify the areas that need attention. This includes branches that are crossing or rubbing against each other, as well as dead or diseased branches. I also trim back branches that have become excessively long and leggy. It’s essential to remove these branches completely, cutting them back to the main stem or a healthy lateral branch.
Timing is crucial when it comes to pruning. Most plants should be pruned in early spring, before new growth begins. However, it’s important to research the specific needs of your plants or consult a gardening expert for guidance on when to prune. Pruning at the right time helps maintain plant health and vitality.
In addition to preserving plant health, pruning also contributes to a visually pleasing garden. By removing excess growth and shaping the plants, I create a more balanced and appealing outdoor space. Regular pruning prevents overcrowding, allowing each plant to receive adequate sunlight and air circulation.
Cleaning and Organizing Gardening Tools

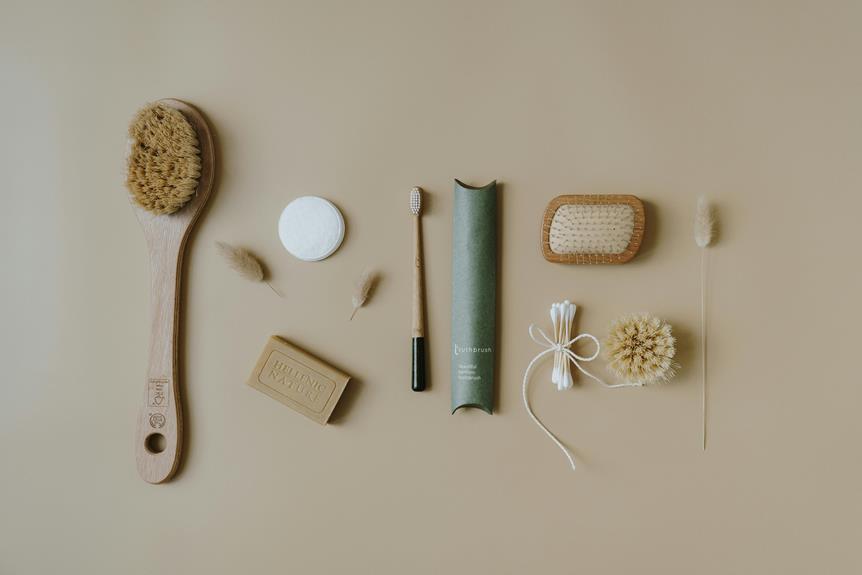
Keeping your gardening tools clean and organized is essential for maintaining their functionality and prolonging their lifespan. As gardeners, we take pride in our tools and want to ensure they’re in optimal condition for our gardening endeavors. Organizing gardening tools not only makes them easily accessible but also helps create a sense of order and efficiency in our outdoor spaces.
To begin the process, gather all your tools in one place. This allows you to assess what needs cleaning, repairing, or replacing. Start by removing any dirt, mud, or debris from the tools using a brush or hose. For stubborn dirt, you can use a mixture of warm water and mild detergent. Remember to thoroughly dry the tools to prevent rust.
Next, inspect the tools for any damage or wear. Replace broken or worn-out handles and sharpen dull blades. This not only makes the tools easier to use but also prevents accidents or injuries while gardening.
It’s also important to clean and maintain bird feeders, as they play a crucial role in attracting birds to our gardens. Regularly clean bird feeders by removing old seeds and debris, and sanitize them with a mild solution of bleach and water. This helps prevent the spread of diseases among our feathered friends.
Once the tools are cleaned and repaired, it’s time to organize them. Consider investing in a tool rack or storage system that will keep your tools neatly arranged and easily accessible. Labeling or color-coding can also be helpful in quickly identifying specific tools.
Removing Weeds and Unwanted Plants

When it comes to removing weeds and unwanted plants, it’s important to keep our outdoor spaces clean and organized. Weed control is crucial for the health and beauty of our gardens. Weeds not only compete with our desired plants for nutrients, but they also take away from the visual appeal of our outdoor areas.
To effectively control weeds, I suggest using a combination of manual and chemical methods.
When manually removing weeds, be sure to wear gloves to protect your hands. Start by loosening the soil around the base of the weed using a hand trowel or fork. Gently pull the weed from the ground, making sure to remove the entire root system. Dispose of the weeds in a designated area for plant disposal, such as a compost pile or green waste bin. This will prevent the weeds from coming back into your garden.
Chemical weed control can be a useful option for larger infestations or hard-to-reach areas. However, it’s important to use these products carefully and follow the instructions to avoid harming desired plants or pollinators.
Select a herbicide specifically designed for the types of weeds you’re targeting and apply it according to the recommended dosage and timing. Always wear protective clothing and take precautions to prevent the herbicide from contacting other plants.
Scrubbing Outdoor Furniture

Maintaining outdoor furniture is crucial to keep it clean and in good condition. As we spend more time outside during the warmer months, our furniture gets exposed to the elements and can get dirty and worn. However, with a little care and attention, we can easily revive our outdoor furniture and protect it for years to come.
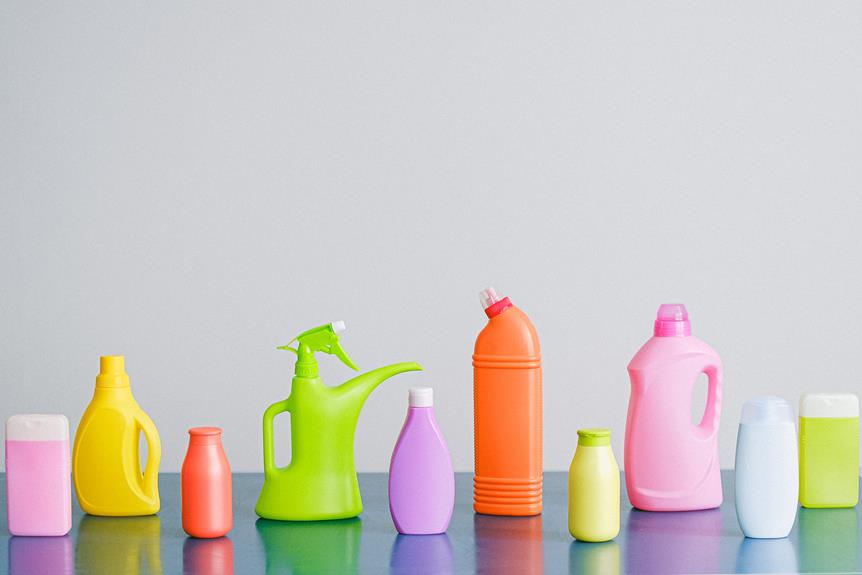
To effectively clean your outdoor furniture, follow these tips:
- Start with a gentle clean: Use a mild detergent mixed with warm water to wipe down your furniture. This will remove surface dirt and grime without causing any damage to the material.
- Pay attention to cushions: Cushions often accumulate dirt, stains, and even mold. Remove the cushion covers and wash them according to the manufacturer’s instructions. For stubborn stains, spot clean with a gentle fabric cleaner. Make sure the cushions are completely dry before putting them back in place.
- Protect the furniture: After cleaning, it’s important to protect your outdoor furniture from further damage. Apply a protective sealant or wax to wooden furniture to prevent fading and cracking. For metal furniture, consider using a rust-resistant spray to maintain its appearance.
- Cover it up: When your outdoor furniture isn’t in use, cover it with weather-resistant covers. This will help protect it from rain, sun damage, and dirt buildup. It’s also a good idea to store cushions and other removable parts indoors during the off-season.
Cleaning and Maintaining Pathways
To ensure the cleanliness and safety of our outdoor spaces, it’s important to take care of our pathways. Not only does this enhance the appearance of our outdoor areas, but it also prevents tripping hazards.
Here are some tips for repairing cracks and removing stains from your pathways:
Repairing cracks:
- Clean the crack with a wire brush and remove any loose debris.
- Fill the crack with a concrete crack repair caulk.
- Smooth the surface with a trowel and allow it to dry.
- Apply a concrete sealer for added protection.

Removing stains:
- Start by sweeping the pathway to remove loose dirt and debris.
- Mix a solution of warm water and mild detergent.
- Scrub the stained areas with a stiff brush.
- Rinse the pathway with clean water and allow it to dry.
- For stubborn stains, consider using a specialized cleaner or a pressure washer.
Cleaning and Disinfecting Pots and Planters
Regularly cleaning and disinfecting your pots and planters is crucial for the health of your plants and the overall atmosphere of your garden. Follow these tips to effectively clean and disinfect your pots and planters:
- Disinfect your garden tools: Before you start cleaning, make sure to disinfect your garden tools. Soak them in a solution of bleach and water or use a disinfectant spray. Rinse them thoroughly afterward.
- Clean ceramic and plastic pots: Begin by removing any soil or plant debris from ceramic and plastic pots. Scrub them with a mixture of warm water and mild dish soap. Rinse well and let them air dry. Stubborn stains can be removed with a mixture of vinegar and water.
- Clean and seal wooden planters: Wooden planters require extra care to prevent rot and decay. Remove plants and soil from the planter and scrub the inside and outside with a stiff brush and a mixture of warm water and mild dish soap. Rinse thoroughly and allow the planter to dry completely. Apply a layer of wood sealant to protect it from moisture.
- Disinfect terra cotta pots: Terra cotta pots are porous and can harbor bacteria and fungi. Soak them in a solution of bleach and water for about 30 minutes. Scrub off any remaining residue, rinse well, and let them air dry.
Checking and Repairing Fencing
Once you’ve finished cleaning and disinfecting your pots and planters, it’s time to turn your attention to checking and repairing your fencing. Your fence serves as both a security measure and an aesthetic feature for your outdoor space.
Over time, fences can sustain damage from weather conditions, wear and tear, or accidents. Regularly inspecting and repairing any damages is crucial to ensure the longevity and effectiveness of your fence.
Start by walking along the perimeter of your fence and carefully examining each section for any signs of damage. Look out for loose or broken boards, rusted nails or screws, and any sagging or leaning sections. These issues can compromise the structural integrity of your fence and require immediate attention.

Once you’ve identified the areas that need repair, it’s important to choose the right materials for the job. The choice of materials will depend on factors such as the type of fence you have and your personal preferences.
Common options for fencing materials include wood, vinyl, aluminum, and chain-link. Each material has its advantages and disadvantages, so it’s important to consider factors like durability, maintenance requirements, and cost before making a decision.
For your convenience, here’s a comparison of different fencing materials to help you make an informed choice:
- Wood: Natural, versatile, and can be customized. However, it requires regular maintenance and may rot or warp over time.
- Vinyl: Low maintenance, durable, and resistant to rot and insects. However, it can be more expensive and has limited design options.
- Aluminum: Lightweight, long-lasting, and rust-resistant. However, it’s not as strong as other materials and may dent easily.
- Chain-link: Affordable, low maintenance, and provides visibility. However, it offers less privacy and may not be as aesthetically pleasing.
Cleaning and Maintaining Water Features
Regularly maintaining water features is crucial to keep them clean and functioning properly. As a proud owner of a pond or fountain, you want to ensure it remains a beautiful and serene addition to your outdoor space. Here are some tips to help you maintain your pond and clean your fountain:
- Check water quality regularly: Test the water in your pond to ensure the pH levels are balanced and the water is clear. Use appropriate treatments to maintain water quality and prevent the growth of algae or harmful bacteria.
- Clean the pond: Remove any debris, such as leaves or twigs, from the surface of the pond. Use a skimmer net to skim the water and remove floating debris. Consider installing a pond vacuum to clean the bottom of the pond and remove accumulated sediment.
- Maintain the pump: The pump is a crucial component of your water feature. Regularly check the pump to ensure it’s functioning properly and clean it to remove any debris that may affect its performance. If necessary, consider replacing the pump to ensure optimal functioning.
- Clean the fountain: If you have a fountain, it’s important to clean it regularly to keep it looking its best. Remove dirt or debris from the fountain and clean the pump and fountainhead. Consider using a mild detergent or vinegar solution to remove stubborn stains.
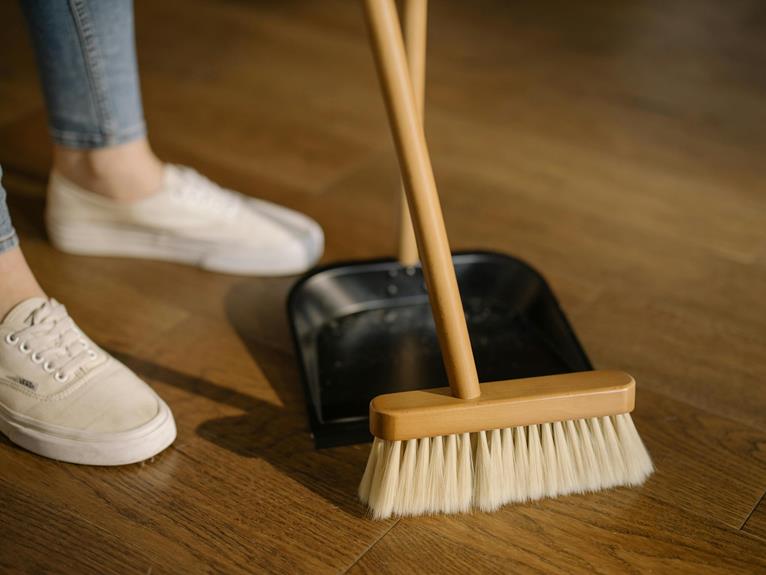
Raking and Removing Leaves
I grab my trusty rake and start clearing the fallen leaves from my outdoor space. As I rake, the cool autumn air fills my lungs, and I feel a strong connection to the natural world around me. Raking leaves isn’t just a chore; it’s an opportunity to connect with nature and take care of my outdoor area.

While raking is the traditional way to remove leaves, there are other effective techniques available. One such technique is leaf mulching. Instead of removing the leaves, I can mow over them, turning them into small pieces that can be left on the ground as natural mulch. This not only saves time and effort but also provides nutrients to the soil as the leaves decompose.
For those who prefer an eco-friendly option, there are alternatives to leaf removal. One option is to use a leaf blower with a mulching function. This allows me to collect the leaves and then mulch them, reducing waste and providing nutrient-rich mulch for my garden. Another alternative is to use a compost bin specifically designed for leaves.
As I continue to rake and remove the leaves, I feel a sense of accomplishment and satisfaction. Not only am I clearing my outdoor space, but I’m also taking care of the environment in an eco-friendly way. Raking and removing leaves may seem like a simple task, but it’s an important part of maintaining a healthy and vibrant outdoor space.
Cleaning and Maintaining Outdoor Lighting
Now that the leaves are cleared and my outdoor space is refreshed, it’s time to focus on cleaning and maintaining outdoor lighting. As the days get shorter and the nights get darker, it’s important to have well-maintained outdoor lighting for both aesthetics and safety. Here are some essential tips:
- Cleaning solar lights: Start by removing any debris or dirt from the solar panels using a soft cloth or brush. Check the batteries and replace them if needed. Finally, wipe down the entire light fixture with a damp cloth to remove any remaining dirt or grime.
- Preventing rust on outdoor lighting: Rust can be a common problem, especially in areas with high humidity or frequent rainfall. To prevent rust, regularly clean the light fixtures with a mild detergent and water solution. Applying a protective coating, like clear lacquer or rust-resistant paint, can also help.
- Checking for loose connections: Over time, outdoor lighting fixtures may develop loose connections, which can affect their performance. Regularly check and tighten any loose wires or connections to ensure proper functioning of the lights. This helps prevent issues like flickering or dimming.
- Replacing broken or damaged bulbs: If any bulbs in your outdoor lighting fixtures are broken or damaged, it’s important to replace them promptly. Broken bulbs not only affect the appearance of your outdoor space but also reduce the effectiveness of the lighting.
Preparing Soil for New Plants
To ensure optimal growth and health for new plants, it’s important to properly prepare the soil. Having good-quality soil is crucial for successful gardening. Before planting, take the time to prepare the soil to create the best environment for your plants to thrive.
Soil preparation involves a few simple steps. Remove any weeds, rocks, or debris from the planting area. This will create a clean space for your new plants to grow.
Loosen the soil by tilling or digging it. This helps break up compacted soil and improves drainage, allowing the roots to easily access essential nutrients.
After preparing the soil, enrich it with organic matter. This can be done by adding compost, well-rotted manure, or other organic materials. Organic matter not only improves soil fertility but also helps retain moisture and promotes beneficial soil organisms. Thoroughly mix the organic matter into the soil, ensuring it’s evenly distributed.
Once the soil is prepared, you can begin planting. Consider the specific needs of the plants you intend to grow. Different plants have different requirements, so research and understand their individual needs. Pay attention to factors such as spacing, planting depth, and watering requirements.
By following these steps, you’ll create a healthy foundation for your new plants to thrive and flourish.
Cleaning and Maintaining Bird Feeders
Cleaning and maintaining bird feeders is crucial for the well-being of our feathered friends. As nature enthusiasts, we want to create a welcoming environment that attracts various bird species to our outdoor spaces. Here are some tips to help you with bird feeder maintenance and make your garden a haven for our avian companions:
- Keep it clean: Regularly clean your bird feeders to prevent the buildup of mold, bacteria, and other harmful substances. Use a mild detergent and warm water to scrub the feeder thoroughly. Rinse it well and let it dry completely before refilling.
- Inspect for damage: Check your bird feeders for cracks or loose parts. Repair or replace damaged feeders to ensure they remain safe and functional. Sturdy feeders will attract a wider variety of bird species and provide them with a reliable food source.
- Choose the right seeds: Select a variety of bird seeds to attract different types of birds. Black oil sunflower seeds are a favorite among many species, while finches love nyjer seeds. Experiment with different seed blends to see which ones attract the most diverse range of birds to your feeder.
- Location matters: Consider where you place your bird feeder. It should be in an open area, away from potential predators like cats. Providing nearby shelter, such as trees or shrubs, will give birds a safe place to rest and observe before visiting the feeder.
Cleaning and Maintaining Compost Bins
Maintaining compost bins is essential for successful composting and a thriving outdoor space. It’s important to prioritize the care and maintenance of your compost bins.
By following a few simple steps, you can ensure that your compost bins remain in good condition and continue to produce nutrient-rich compost for your garden.
Regular cleaning is crucial for maintaining compost bins. It’s recommended to clean the bins at least once a year, preferably in the spring. Start by emptying the compost bin and removing any leftover material. Use a hose or pressure washer to thoroughly clean the bin, removing any stuck-on residue or debris. Let the bin dry completely before refilling it with fresh compost material.
Troubleshooting composting issues is another important aspect of maintaining compost bins. If you notice unpleasant odors coming from your compost bin, it may be a sign of improper composting. Check the moisture levels of your compost and adjust accordingly. Too much moisture can cause a foul smell, while too little moisture can slow down the composting process.
Pests can also be a common issue in compost bins. To prevent pests from infiltrating your compost, maintain a balance between green and brown materials. Avoid adding meat, dairy, or oily foods, as they can attract unwanted critters. If pests are already present, consider covering your compost bin with a lid or using a wire mesh to keep them out.
Storing and Organizing Seasonal Decorations
When it comes to storing and organizing seasonal decorations, it’s important to have a system in place that keeps everything tidy and easily accessible for the next season. Here are some tips to help you with this task:
- Use clear plastic containers: Invest in clear plastic containers to store your decorations. This will make it easier to see what’s inside without having to open every box. Label each container with the specific holiday or season, so you can easily find what you need when the time comes.
- Group similar decorations together: Categorize your decorations by holiday or season. Keep all the Christmas ornaments in one box, Halloween decorations in another, and so on. This way, you won’t have to search through multiple containers to find what you’re looking for.
- Maximize vertical space: Make the most of your storage area by utilizing vertical storage options. Hang wreaths and garlands on hooks or hangers, and use shelves or stacking bins to keep your outdoor space tidy and free from clutter.
- Protect fragile items: To ensure your delicate decorations stay safe during storage, use bubble wrap or tissue paper to wrap breakable items. Place them in separate containers or compartments to prevent any accidental damage.
Conclusion
After completing all the necessary tasks for the seasonal cleaning of outdoor spaces and gardens, I feel a great sense of satisfaction and accomplishment.
The hard work and effort put into clearing out debris, pruning plants, and cleaning tools have paid off, leaving the space fresh and ready for new growth.
Now that everything is organized and prepared, I can’t help but wonder about the beautiful transformations this space will undergo in the next season.

Will vibrant flowers bloom, attracting butterflies and bees? Perhaps the vegetable garden will yield a bountiful harvest, providing fresh produce for meals.
It’s exciting to think about the possibilities and the joy that this well-maintained outdoor space will bring.
