
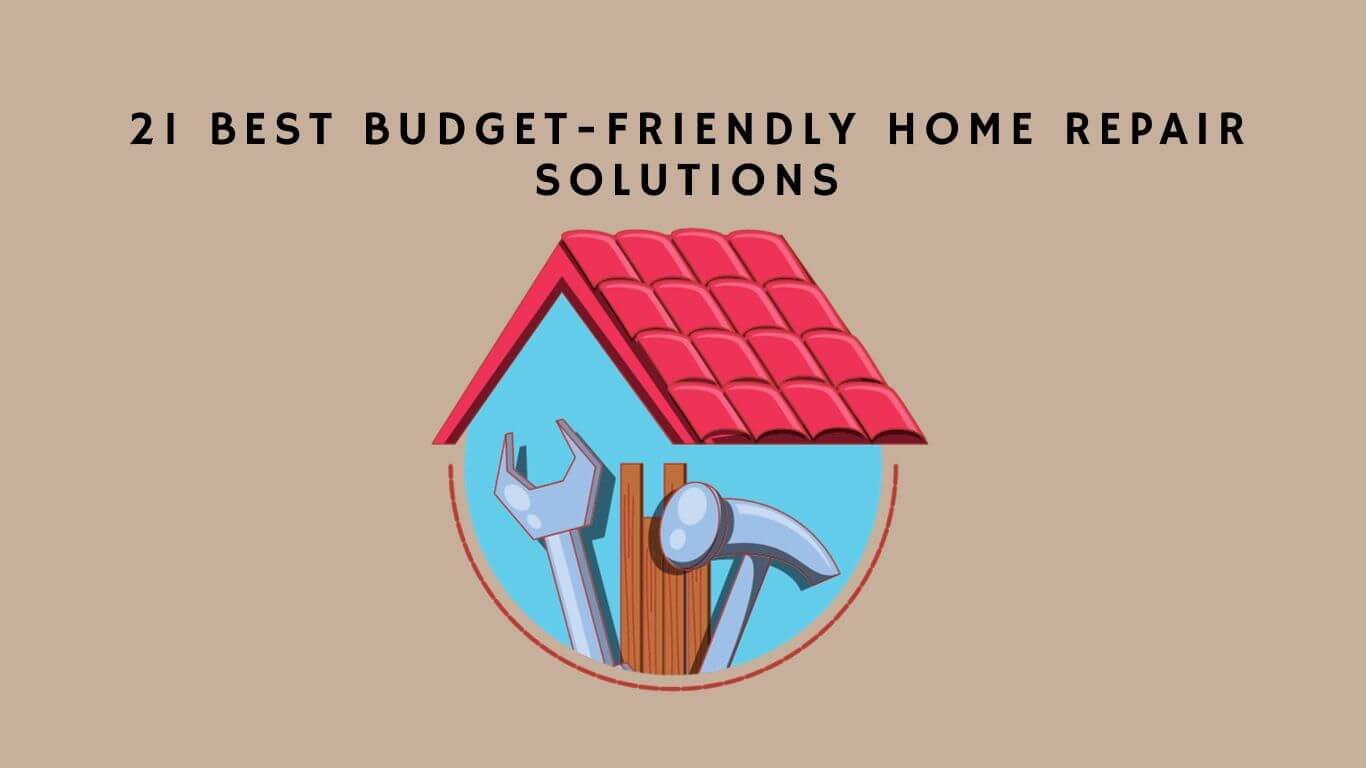
If your home is feeling like a sinking ship, fear not! We’ve got the lifeboats you need with our 21 best budget-friendly home repair solutions.
Just like a captain navigating treacherous waters, you can steer your home back to safety with these practical and detailed tips.
From fixing leaky faucets to patching up cracked concrete, we’ve got you covered.
Get your tools and get ready to restore your home to its former glory, all while saving some hard-earned cash.
Fixing Leaky Faucets
Are you tired of dealing with leaky faucets in your home? Don’t worry, you’re not alone. Many homeowners face the frustration of constant dripping and wasted water. But before you call a plumber and spend a fortune, why not try some DIY faucet repairs?

Troubleshooting leaky faucets can be a simple and cost-effective fix if you know what to look for. One of the most common faucet problems is a worn-out O-ring or washer. These small rubber components can deteriorate over time, causing leaks.
To fix this, turn off the water supply and disassemble the faucet handle. Replace the faulty O-ring or washer and reassemble the handle. It’s a straightforward process that can save you money.
Another common issue is a loose or corroded valve seat. This can lead to leaks around the spout. To fix it, remove the spout and clean the valve seat. If it’s damaged, you may need to replace it. Remember to use a wrench or pliers to tighten any loose parts while reassembling.
Patching Drywall
When patching drywall, it’s important to properly prepare the surface before applying any repairs. Here are some key tips to help you successfully patch your drywall and achieve a seamless finish:
- Sanding techniques:
- Use a fine-grit sandpaper to smooth out the damaged area and surrounding edges.
- Feather the edges by gradually sanding them at an angle to create a smooth transition between the patch and the existing wall.
Choosing the right patching material:
- For small holes and cracks, lightweight spackling compound or joint compound can be used.
- For larger holes, consider using a drywall patch or a mesh patch that adheres to the wall.

Blending patchwork with existing texture:
- To match the texture of the existing wall, use a sponge, brush, or texture spray to recreate the texture pattern.
- Experiment on a scrap piece of drywall or inconspicuous area before applying the texture to the patched area.
Prime and paint tips:
- Apply a coat of primer to the patched area before painting to ensure proper adhesion and a consistent finish.
- Use the same type and color of paint as the surrounding wall for a seamless blend.
Repairing large holes effectively:
- For large holes, cut a piece of drywall slightly larger than the damaged area and secure it with screws or drywall adhesive.
- Apply joint compound and follow the steps above to blend the patch with the existing wall.
Unclogging Drains
To effectively unclog drains, start by using a plunger to apply pressure and dislodge any blockages. This is one of the most effective unclogging methods that you can try at home. Simply place the plunger over the drain and push down firmly, then pull up quickly to create suction. Repeat this motion several times to loosen the clog.
If the plunger doesn’t work, you can try using a drain snake or auger to physically remove the blockage. These tools are readily available at most hardware stores and can be a great investment for future clogs.

Preventing drain clogs is also important to keep your drains flowing smoothly. Avoid pouring grease or oil down the drain, as they can solidify and cause clogs. Additionally, use a drain cover or strainer to catch hair and other debris before it enters the drain. Regularly cleaning the drain cover will help prevent buildup and reduce the risk of clogs.
If you prefer DIY drain cleaning techniques, there are several natural remedies you can try. Baking soda and vinegar can be mixed together to create a foaming reaction that can help break up clogs. Simply pour the mixture down the drain and let it sit for a few minutes before flushing with hot water. Another option is using a mixture of salt and hot water to dissolve grease and other stubborn clogs.
In some cases, professional drain cleaning services may be necessary. They’ve specialized tools and equipment to effectively remove tough clogs and ensure that your drains are clean and clear. If you’ve tried DIY methods without success, it may be time to call in the professionals.
Repairing Squeaky Floors
To address squeaky floors, start by identifying the source of the squeak and taking appropriate measures to eliminate it.
Here are some practical steps you can take to repair your squeaky floors:
- Repairing the Subfloor: Inspect the subfloor beneath the squeaky area. If there are loose or damaged sections, use screws to secure them back in place. This will help stabilize the floor and reduce the squeaking.
- Lubricating Hinges: Sometimes, squeaky floors can be caused by hinges that need lubrication. Apply a small amount of lubricant to the hinges of any doors in the area. This can help reduce friction and eliminate the squeak.
- Reinforcing Floor Joists: If the squeak persists, it may be due to weakened or damaged floor joists. Use metal braces or additional support beams to reinforce the joists and provide extra stability to the floor.
- Fixing Loose Floorboards: Loose floorboards can also contribute to squeaks. Identify any loose boards and secure them with screws or nails. This will prevent them from moving and causing noise when walked on.
- Soundproofing Floors: If the squeaking is bothersome or you want to reduce noise transmission between floors, consider soundproofing your floors. Install acoustic underlayment or carpet padding to absorb sound and minimize squeaks.

By following these steps, you can effectively repair your squeaky floors and enjoy a quieter, more comfortable home.
Remember to address the source of the squeak and take the necessary measures to eliminate it for good.
Replacing Broken Tiles
If you have broken tiles in your home, start by assessing the extent of the damage. Are there just a few cracked tiles, or is the damage more widespread? Once you have a clear idea of what needs to be replaced, you can consider your options for fixing the problem.
For minor cracks and chips, you may be able to simply regrout the tiles. This involves removing the old grout and replacing it with fresh grout. You can find tile repair kits at your local home improvement store that contain everything you need for this task.
If the damage is more severe and requires tile replacement, you have two choices: DIY or hiring professional tilers. If you’re confident in your DIY skills, you can purchase replacement tiles and tackle the job yourself. Just make sure to follow the proper steps for removing the old tiles, preparing the surface, and installing the new tiles.

However, if you aren’t comfortable with DIY projects or if the damage is extensive, it may be best to hire professional tilers. They’ve the expertise and tools needed to complete the job efficiently and effectively.
To prevent tile damage in the future, be mindful of heavy objects that could crack or break tiles. Use rugs or mats in high-traffic areas to protect the tiles from wear and tear. Regularly clean and maintain your tiles to prevent dirt and grime buildup, as this can weaken the tiles over time.
Painting Walls on a Budget
For an affordable way to refresh your home, consider painting the walls with a coat of paint from a budget-friendly brand. Painting walls on a budget is a great way to give your home a fresh new look without breaking the bank. Here are some tips to help you get started:
- Painting Techniques
- Before you begin, make sure to clean the walls and patch any holes or cracks.
- Use a roller for large areas and a brush for corners and edges.
- Apply the paint in thin, even coats to ensure a smooth finish.
- Color Selection
- Choose light colors to make your space feel larger and brighter.
- Consider using accent walls or different shades of the same color to add depth and interest.
When it comes to affordable paint options, there are plenty to choose from. Look for budget-friendly brands that offer quality paints at a lower price point. You can also save money by repurposing old paint cans. If you have leftover paint from previous projects, mix them together to create a custom color or use them for touch-ups.
With these DIY painting tips and tricks, you can transform your walls on a budget and create a space that reflects your style and personality. So grab a brush and get painting!
Restoring Old Furniture

When restoring old furniture, you can revive worn-out pieces and give them a new lease on life. Refinishing antiques is a great way to bring back their original beauty. Begin by removing the old finish using sandpaper or a chemical stripper. Then, apply a fresh coat of stain or paint to enhance the wood’s natural color or give it a whole new look.
Repurposing furniture is another creative option. Consider transforming an old dresser into a stylish TV stand or a vintage suitcase into a unique coffee table. Upholstery tips can come in handy when dealing with worn-out or damaged fabric.
You can easily reupholster chairs and sofas by removing the old fabric, replacing it with new upholstery fabric, and securing it with a staple gun. If you have wobbly chairs, try tightening the screws or adding wood glue to reinforce the joints.
Painting techniques can update the look of old furniture without spending a fortune. Consider using chalk paint for a distressed look or spray paint for a quick and even finish. Restoring old furniture not only adds character to your home but also gives you a sense of accomplishment and belonging.
Sealing Drafty Windows
To seal drafty windows, start by identifying any gaps or cracks that may be allowing cold air to enter your home. Once you’ve located the problem areas, there are several budget-friendly solutions you can try to keep your home warm and cozy:
- Energy efficient insulation: Consider adding insulation around your windows to prevent drafts. You can use foam tape or weatherstripping to seal any gaps between the window frame and the wall.
- DIY weatherstripping: Weatherstripping is an effective way to seal drafts around windows. You can purchase self-adhesive weatherstripping strips and attach them to the edges of your windows. Make sure to measure the gaps accurately to get the right size.
- Window film installation: Window films are a cost-effective solution to improve insulation. They’re easy to install and can help reduce heat loss through your windows. Simply apply the film to the inside of the window and use a hairdryer to remove any wrinkles.
- Caulking techniques: Use caulk to seal any gaps or cracks around your windows. Make sure to clean the area thoroughly and apply a thin, even layer of caulk. Smooth it out with a caulk finishing tool or your finger for a professional look.
- Window sealant application: Consider using a window sealant to fill in any gaps or cracks. Apply the sealant carefully, following the manufacturer’s instructions. This will help create an airtight seal and prevent cold air from seeping in.
Repairing or Replacing Damaged Door Frames

Repair or replace damaged door frames to ensure the security and insulation of your home. Damaged door frames can compromise the safety of your house and let in drafts, moisture, and pests. To address this issue, there are a few budget-friendly solutions you can consider.
If you have cracked windows, repairing them is a good starting point. Cracked windows can cause drafts and worsen the condition of your door frames. You can repair minor cracks using window repair kits available at hardware stores. For more extensive damage, it may be necessary to replace the window altogether.
Another common issue with door frames is damaged weatherstripping. Weatherstripping helps seal the gaps between the door and the frame, preventing drafts and energy loss. If your weatherstripping is damaged or worn out, it’s time to replace it. You can find affordable weatherstripping options at your local home improvement store.
In addition to cracked windows and damaged weatherstripping, other door frame issues may include broken screen doors, water damage, and warped frames. If you have a broken screen door, consider repairing or replacing it to improve ventilation and keep insects out.
Water damage can weaken the door frame, so it’s important to address it promptly. Warped door frames can affect the functionality of your door and compromise security, so replacing them is often necessary.
Fixing a Running Toilet
If you’ve noticed a running toilet, it’s important to address this issue promptly to avoid wasting water and potentially higher water bills. Here are some toilet repair tips to help you troubleshoot and fix common toilet problems:
- Check the flapper valve: The flapper valve is responsible for controlling the water flow from the tank to the bowl. If it’s worn out or not properly aligned, it can cause the toilet to run continuously. Make sure it’s in good condition and properly sealing the flush valve.
- Adjust the float: The float is a small mechanism that controls the water level in the tank. If it’s set too high, the water will constantly run. Adjust the float arm or bend the float ball to lower the water level and stop the running.
- Replace the fill valve: If the above steps don’t solve the issue, you may need to replace the fill valve. This is a bit more involved, but with some DIY toilet repairs, you can easily replace the fill valve and solve the problem.
- Clean the flush holes: Over time, mineral deposits can build up in the flush holes under the rim of the toilet bowl, affecting the flushing power. Use a wire hanger or a small brush to clean these holes and restore proper flushing.
Replacing Worn-Out Light Fixtures
When fixing a running toilet, it’s important to address the issue promptly to avoid wasting water and potentially higher water bills. However, if you’re dealing with worn-out light fixtures, there are a few simple steps you can take to replace them and brighten up your space.
Light fixture installation is an easy and cost-effective way to upgrade outdated light fixtures in your home. By replacing worn-out fixtures, you can not only improve the aesthetics of your space but also enhance the functionality and energy efficiency of your lighting.
To get started, here are some key steps to keep in mind:
Steps to Replace Worn-Out Light Fixtures
1. Turn off the power | Before starting any work, make sure to turn off the electricity to the fixture at the circuit breaker.
2. Remove the old fixture | Unscrew the old fixture from the ceiling or wall and disconnect the wires.
3. Install the new fixture | Follow the manufacturer’s instructions to install the new fixture, connecting the wires securely.
4. Choose the right light bulbs | Consider energy-efficient lighting options such as LED or CFL bulbs to save on electricity bills.
Repairing or Replacing Damaged Electrical Outlets

To continue upgrading your home’s lighting and electrical systems, now let’s focus on repairing or replacing damaged electrical outlets. Faulty outlets can pose a safety hazard and cause inconvenience in your daily life. Here are some practical and budget-friendly solutions for addressing this issue:
- Repairing faulty wiring: If you suspect that the issue lies within the wiring connected to the outlet, it’s essential to address it promptly. Hire a licensed electrician who can diagnose and repair any wiring problems to ensure the safety of your home.
- Installing new electrical outlets: Sometimes, the best solution is to replace the damaged outlet with a new one. This is especially true if the outlet is old or worn out. You can find affordable electrical outlets at your local hardware store and install them yourself with a few basic tools. However, it’s crucial to follow proper safety procedures and consult an electrician if you’re unsure about the installation process.
- Troubleshooting electrical problems: If you’re experiencing intermittent power issues or multiple outlets not working, it might be necessary to troubleshoot the electrical system. This could involve checking the circuit breakers, testing the wiring connections, and ensuring proper grounding. Consider hiring an electrician for more complex electrical problems.
Restoring Hardwood Floors
To restore hardwood floors, assess the condition of the flooring and determine the best course of action. Before diving into the restoration process, it’s crucial to evaluate the extent of damage and decide whether a DIY approach or professional help is needed. Here is a handy table to guide you through the process:
| Assess the Condition | Determine Refinishing Options | Choose the Right Technique | Protect the Floor |
|---|---|---|---|
| Inspect for scratches, gouges, or stains | Sanding and refinishing | Choose between drum, orbital, or hand sanding | Lay down drop cloths or plastic sheets |
| Check for warped or damaged boards | Recoating or buff and recoat | Follow proper sanding technique | Use furniture pads or felt protectors |
| Evaluate the level of wear and tear | Staining or coloring | Vacuum or sweep the floor thoroughly | Apply a protective finish |
When it comes to restoring hardwood floors, it’s important to avoid common mistakes such as using incorrect sanding techniques or skipping proper floor protection. DIY projects can be cost-effective, but hiring a professional ensures a high-quality finish and saves you time and effort.
Remember to research and choose the right products and tools for your specific needs. By following these steps and considering your options carefully, you can restore your hardwood floors and bring back their natural beauty without breaking the bank.
Fixing a Leaky Roof
Now let’s move on to fixing a leaky roof, which is another common home repair issue that can be addressed within a budget. When it comes to fixing roof leaks, there are a few options you can consider:
- DIY Roof Repair:
- Start by locating the source of the leak. Look for any damaged or missing shingles, cracked flashing, or clogged gutters.
- Once you’ve identified the problem area, you can attempt to fix it yourself using roofing cement, a patch, or sealant. Just make sure to follow the manufacturer’s instructions and take necessary safety precautions.
- Hiring a Professional:
- If you’re not comfortable with DIY repairs or if the leak is severe, it’s best to hire a professional roofer. They’ve the expertise and tools to quickly and effectively fix the problem, preventing further water damage to your home.
- Get multiple quotes from reputable roofers and ask for references to ensure you’re hiring a reliable professional.

In addition to fixing roof leaks, it’s important to practice regular roof maintenance to prevent future issues. Here are a few tips:
- Inspect your roof at least twice a year, especially after severe weather events.
- Keep your gutters clean and free from debris to prevent water backup.
- Trim any overhanging branches that could damage your roof.
Repairing or Replacing Damaged Gutters
Proper gutter maintenance is crucial for preventing water damage to your home’s foundation and walls. If you notice any signs of damage, such as leaks or sagging, it’s important to address them promptly to avoid further issues.
For DIY gutter repair, start by cleaning out any debris and unclogging the downspouts. Use a garden hose to flush out any remaining dirt or leaves. Look for any cracks or holes in the gutters and patch them using a waterproof sealant.
If the damage is extensive, you may need to replace the damaged section of the gutter. Measure the length needed and purchase a replacement gutter section from a local home improvement store.
If you’re not comfortable with DIY repairs or if the damage is severe, it’s best to hire a professional for gutter repair. They have the expertise and tools to handle the job efficiently and ensure that the repairs are done correctly. They can provide advice on gutter replacement options if necessary.
Replacing Broken Doorknobs or Locks
If your broken doorknob or lock is causing frustration and compromising the security of your home, it’s time to consider replacing them with budget-friendly options.
Here are some reasons why upgrading your door hardware is a wise investment:
- Upgrading security: By replacing outdated locks, you can enhance the safety of your home and protect your loved ones from potential threats. Investing in modern locks with advanced features will give you peace of mind.
- Enhancing curb appeal: Upgrading front door hardware can instantly transform the look of your home’s exterior. Choose door handles and knobs that complement your home’s architectural style and add a touch of elegance and sophistication.
- Adding convenience: Installing keyless entry systems eliminates the need for keys and provides a convenient way to access your home. With keyless entry, you can enter your home with a simple code or even use your smartphone.
- Improving energy efficiency: Replacing drafty door knobs with energy-efficient options can help reduce heat loss and lower your energy bills. Look for door hardware with weatherstripping and insulation to keep your home comfortable all year round.
- Ensuring safety: Promptly replacing broken doorknobs is crucial for the safety of your household. A broken doorknob can make it easier for intruders to gain access to your home, so it’s essential to fix or replace it as soon as possible.
Repairing or Replacing Damaged Kitchen Cabinets
To address any damage to your kitchen cabinets, consider repairing or replacing them with budget-friendly options that will enhance both the functionality and appearance of your space.
Repairing damaged cabinets can be a cost-effective solution, especially if the damage is minimal. Start by assessing the extent of the damage. If it’s just a few scratches or dents, you can easily fix them yourself. Use wood filler to fill in the scratches and sand it down to create a smooth surface. Then, apply a coat of paint or stain to match the rest of the cabinet.
If the damage is more severe, such as broken hinges or warped doors, you may need to replace those specific parts. Look for affordable replacements at your local hardware store or online.

Another option is refinishing kitchen cabinets. This involves stripping off the old finish and applying a new one. It can be a time-consuming process, but it’s a great way to give your cabinets a fresh look without having to replace them entirely.
Unclogging Gutters and Downspouts
One common home repair task that can be done on a budget is unclogging gutters and downspouts. Proper maintenance of your gutters is essential to prevent water damage to your home’s foundation and walls. Here are some tips to help you tackle this task:
- Preventive maintenance:
Regularly inspect your gutters and downspouts to identify any clogs or debris buildup. By addressing these issues early on, you can prevent more significant problems down the line. - DIY gutter cleaning:
With a sturdy ladder, gloves, and a garden hose, you can clean your gutters yourself. Start by removing larger debris by hand, then flush out any remaining dirt and leaves with water. Be sure to check for any leaks or damage while cleaning. - Importance of gutter guards:
Consider installing gutter guards to prevent debris from entering your gutters in the first place. These guards can save you time and effort by reducing the frequency of cleaning. - Professional gutter cleaning services:
If you’re not comfortable with heights or don’t have the necessary tools, hiring a professional gutter cleaning service is a viable option. They’ve the expertise to thoroughly clean and inspect your gutters, ensuring they function properly. - Common gutter and downspout issues:
Some common problems you may encounter include clogs caused by leaves, twigs, or bird nests, as well as sagging gutters or detached downspouts. Addressing these issues promptly will help maintain the integrity of your gutter system.
Fixing a Broken or Loose Staircase Railing
Are you struggling with a broken or loose staircase railing and wondering how to fix it without breaking the bank? Don’t worry, there are budget-friendly solutions available to help you tackle this issue and restore the safety and beauty of your staircase.
When it comes to fixing loose banisters or repairing cracked railings, one of the most effective and affordable options is to reinforce the wobbly handrails. This can be done by adding brackets or brackets and screws to secure the railing firmly to the wall.
Another common problem is broken spindles, which can be easily replaced by removing the old ones and inserting new ones.
If you notice that your staircase balusters are loose, you can tighten them by applying wood glue to the loose joints and clamping them until the glue dries.
Repairing or Replacing Damaged Bathroom Fixtures
If you’re dealing with damaged bathroom fixtures, such as a leaky faucet or a cracked toilet, there are affordable solutions to help you repair or replace them without breaking the bank. Here are some practical and budget-friendly tips to address common bathroom fixture issues:
- Repairing Chipped Tiles:
- Gently clean the chipped area with a mild detergent and dry it thoroughly.
- Apply a small amount of tile adhesive or epoxy to the chipped area and carefully smooth it out using a putty knife.
- Let it dry completely before cleaning the repaired tile.
- Replacing Cracked Sinks:
- Measure the dimensions of your existing sink to ensure a proper fit for the replacement.
- Choose a sink that matches your bathroom’s aesthetic and is within your budget.
- Disconnect the plumbing connections and remove the old sink.
- Install the new sink, connecting the plumbing and ensuring a secure fit.
- Fixing Loose Toilet Seats:
- Tighten the bolts that secure the seat to the toilet bowl using a screwdriver or wrench.
- If the bolts are stripped, replace them with new ones.
- Consider using rubber washers to provide extra stability.
- Patching Up Peeling Wallpaper:
- Gently remove any loose or peeling wallpaper using a putty knife.
- Apply wallpaper adhesive to the damaged area and carefully smooth out the wallpaper.
- Allow it to dry completely before trimming any excess.
- Caulking Bathtub Edges:
- Remove any old caulk using a caulk removal tool or a razor blade.
- Clean the bathtub edges thoroughly and ensure they’re dry.
- Apply a thin, even bead of caulk along the edges, using a caulk gun.
- Smooth the caulk with a caulk smoothing tool or your finger.
Patching up Cracked or Damaged Concrete Surfaces
To address any cracked or damaged concrete surfaces in your home, there are cost-effective solutions that can help you patch them up and restore their appearance. When it comes to concrete crack repair options, there are several DIY techniques that you can try before calling in a professional. These affordable concrete patching solutions can save you money while still ensuring a durable and long-lasting repair.
Here are some tips for repairing concrete surfaces on a budget:
- Clean the area: Before starting any repairs, make sure to thoroughly clean the cracked or damaged concrete surface. Remove any loose debris or dirt using a brush or pressure washer.
- Fill the cracks: For small cracks, you can use a concrete crack filler or a silicone caulk to fill the gaps. Apply the filler using a putty knife, making sure to smooth it out evenly.
- Patch larger areas: If you have larger areas of damage, you can use a concrete patching compound. Mix the compound according to the manufacturer’s instructions and apply it using a trowel. Make sure to feather the edges to create a smooth transition with the surrounding concrete.
Conclusion
With these budget-friendly home repair solutions, you can tackle common household problems without breaking the bank.
By fixing leaky faucets, patching drywall, unclogging drains, and more, you can keep your home in great shape without the need for expensive professional help.
These solutions are like a handy toolkit, allowing you to address issues as they arise, just like a skilled handyman.
Get ready to save money while keeping your home in top condition.
