
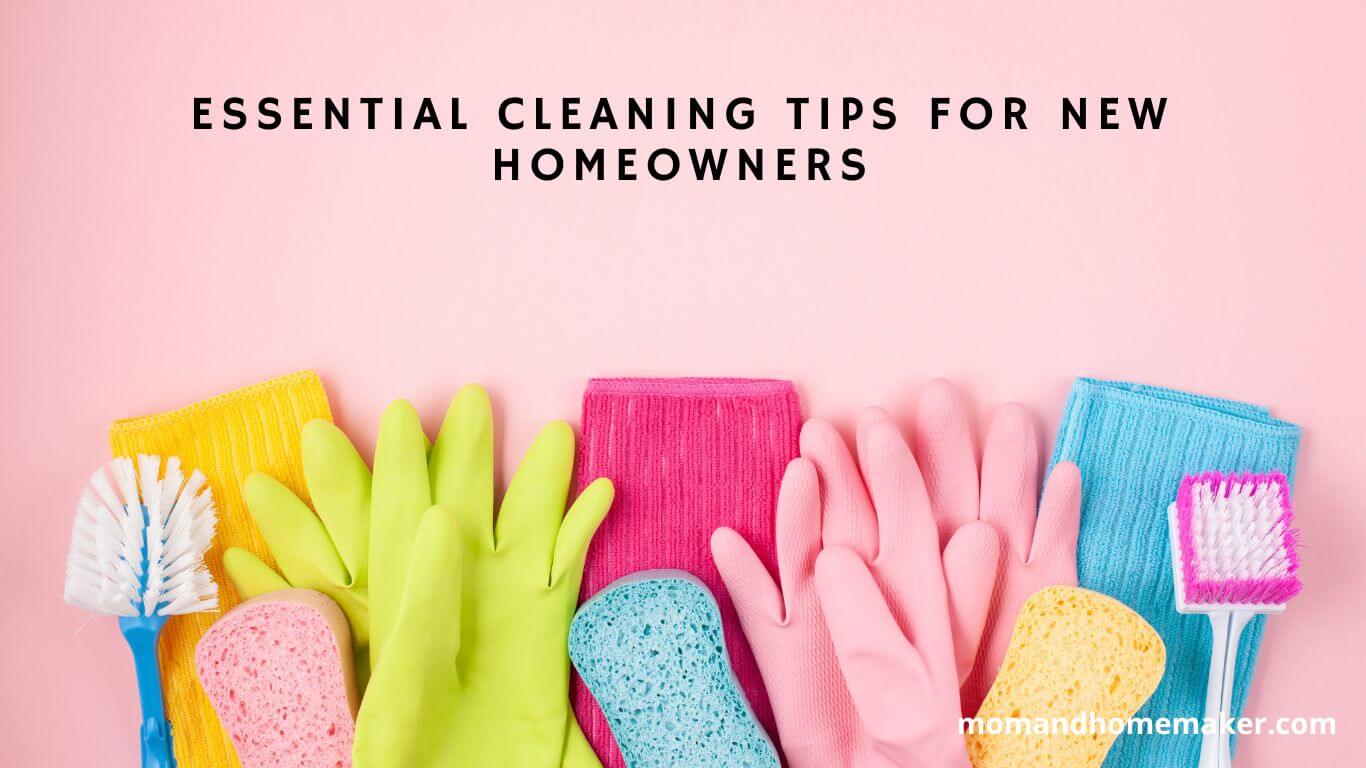
Congratulations on becoming a new homeowner! Owning a home is an exciting milestone, but it also comes with a set of responsibilities, including keeping your new space clean and organized. Whether you’re a first-time homeowner or just looking for some fresh cleaning tips, this blog post is here to help.
In this article, we will share essential cleaning tips specifically tailored for new homeowners. From establishing a cleaning routine to tackling common cleaning challenges, we’ve got you covered. Read on to discover how to maintain a sparkling clean home and create a comfortable living environment for you and your loved ones.

25 Essential Cleaning Tips for New Homeowners
Are you a new homeowner looking for essential cleaning tips?
Let’s start by discussing some important points to help you keep your home clean and organized.
We’ll cover:
- Cleaning kitchen appliances
- Organizing cleaning supplies
- Removing carpet stains
- Cleaning bathroom tiles
- Dusting hard-to-reach areas.
Cleaning Kitchen Appliances

Clean your kitchen appliances regularly to ensure they function properly and maintain their cleanliness. Here are three essential tips for cleaning your kitchen appliances:
- Cleaning refrigerator coils: Over time, dust and debris can accumulate on the coils at the back or bottom of your refrigerator, affecting its efficiency. Use a vacuum or a coil brush to gently remove the buildup and improve the appliance’s performance.
- Descaling coffee maker: Hard water minerals can build up in your coffee maker, affecting the taste of your coffee. Regularly descale it by running a mixture of equal parts vinegar and water through the machine. Follow up with a few cycles of clean water to remove any residual vinegar.
- Degreasing stove top: Cooking can leave behind stubborn grease and grime on your stovetop. Use a degreasing cleaner or a mixture of baking soda and water to scrub away the residue. For gas stove burners, remove the grates and soak them in warm, soapy water before scrubbing them clean.
Organizing Cleaning Supplies
To keep your cleaning routine efficient, it’s important to organize your cleaning supplies properly.
Start by decluttering your supplies and getting rid of any items you no longer use or need. This will free up space and make it easier to find what you’re looking for.
Consider using storage solutions such as bins or baskets to group similar items together. Labeling supplies can also be helpful in quickly identifying what you need.
Invest in a cleaning caddy or bucket to store your most frequently used supplies. This will allow you to easily transport them from room to room. Look for space-saving ideas such as wall-mounted organizers or over-the-door storage racks to maximize your storage space.
Removing Carpet Stains

Tackle carpet stains head-on by promptly treating them with the appropriate cleaning solutions. Here are some essential tips for removing carpet stains:
- Use carpet cleaning products: Invest in quality carpet cleaning products that are specifically designed to remove different types of stains. Read the instructions carefully and follow them for effective results.
- DIY carpet stain removal: For minor stains, you can try some DIY solutions using common household items. For example, a mixture of vinegar and water can be effective for removing pet stains and odors.
- Professional carpet cleaning: For stubborn or extensive stains, it’s best to hire professional carpet cleaners. They have the expertise and specialized equipment to tackle even the toughest stains and restore the beauty of your carpets.
Remember, preventing carpet stains is easier than removing them. Regular vacuuming, immediate blotting of spills, and using doormats can help maintain your carpets’ cleanliness.
With these carpet maintenance tips, you can keep your carpets looking fresh and stain-free for years to come.
Cleaning Bathroom Tiles
For an effective and efficient way to maintain the cleanliness of your bathroom tiles, start by regularly scrubbing them with a mild cleaning solution. Cleaning tile grout is essential to prevent the growth of mold and mildew. Mix equal parts of baking soda and water to create a paste, then apply it to the grout lines and scrub with a small brush. Rinse with warm water and wipe dry.
To remove soap scum, mix equal parts of white vinegar and water in a spray bottle. Spray the solution onto the tiles, let it sit for a few minutes, then scrub with a sponge or brush.

For stubborn water stains, make a paste using equal parts of baking soda and hydrogen peroxide. Apply the paste to the stains, let it sit for a few minutes, then scrub and rinse.
Don’t forget to clean your showerheads by soaking them in vinegar overnight and scrubbing with an old toothbrush.
Dusting Hard-To-Reach Areas
Now, let’s address the challenge of reaching those difficult-to-dust areas in your home. Here are three essential tips to help you tackle these hard-to-reach spots:
- Reaching cobwebs:
Use a long-handled duster or an extendable duster to safely reach and remove cobwebs from high corners, ceilings, and walls. Make sure to start from the top and work your way down for a more efficient clean. - Cleaning high shelves:
Use a step ladder or a sturdy stool to access high shelves. Dust them thoroughly using a microfiber cloth or a duster. If needed, remove items from the shelves to ensure a more thorough cleaning. - Dusting ceiling corners and light fixtures:
Attach a soft brush or a microfiber cloth to an extendable pole to reach ceiling corners and clean light fixtures. Gently wipe away the dust, ensuring to be careful with delicate light fixtures.
Bonus tip:
Don’t forget to move furniture and wipe behind it. Dust tends to accumulate in those hidden areas, so a periodic cleaning will help maintain a dust-free home.
Cleaning Windows Effectively
To effectively clean your windows as a new homeowner, you’ll need the right tools and techniques.

Start by choosing the right window cleaning products. Look for a good quality glass cleaner that’s streak-free and safe for use on windows. Avoid using harsh chemicals that could damage the glass or frames.
When cleaning, use a microfiber cloth or a squeegee instead of paper towels to prevent streaks.
For hard water stains on windows, you can try using a mixture of vinegar and water or a commercial window cleaner specifically designed to remove these stains.
Don’t forget to clean your window screens as well. Remove them carefully and wash them with warm soapy water, then rinse and let them dry before putting them back.
With these effective window cleaning techniques, your windows will be sparkling clean in no time.
Removing Pet Hair

You should regularly use a lint roller or a pet hair remover to effectively remove pet hair from furniture and upholstery in your new home.
Here are three essential tips for removing pet hair and keeping your home clean and allergy-free:
- Use pet hair cleaning tools: Invest in a good quality lint roller, pet hair remover brush, or a rubber glove to easily remove pet hair from various surfaces. These tools are designed to attract and trap pet hair, making the cleaning process quick and efficient.
- Prevent pet hair buildup: Brush your pets regularly to reduce shedding and prevent excessive pet hair from accumulating in your home. Regular grooming not only helps to keep your pet’s coat healthy but also minimizes the amount of loose hair that ends up on your furniture and clothes.
- Remove pet hair from clothes: To remove pet hair from your clothes, you can use a damp sponge or a lint brush. Simply run the sponge or brush over your clothes, and the pet hair will cling to it, making it easy to remove.
Cleaning Oven Racks
To effectively clean oven racks as a new homeowner, it’s essential to utilize a powerful oven cleaner. Cleaning oven racks can be a daunting task, but with the right products and methods, you can easily remove grease and grime.
Start by removing the racks from the oven and placing them in a large sink or bathtub. Fill the sink or bathtub with hot water and add a generous amount of dish soap or baking soda. Let the racks soak for at least an hour to loosen the dirt and grease.
For stubborn stains, you can use a DIY paste made of baking soda and water. Scrub the racks with a brush or sponge, rinse thoroughly, and dry before placing them back in the oven.

Alternatively, you can choose from a variety of commercial oven rack cleaners available in the market. These cleaning products are specifically designed to tackle tough grease and grime, making your job easier.
With these tips and the right cleaning products, you can achieve sparkling clean oven racks in no time.
Disinfecting Cutting Boards
When disinfecting cutting boards as a new homeowner, it’s important to thoroughly clean them to ensure food safety. Here are some essential tips for cutting board hygiene:
- Proper cutting board care:
- Wash your cutting board with hot, soapy water after each use.
- Use a scrub brush to remove any food particles and stains.
- Rinse it well and allow it to air dry.
- Best cutting board materials:
- Choose cutting boards made of materials that are less likely to harbor bacteria, such as plastic or tempered glass.
- Avoid using wooden cutting boards, as they can be more difficult to clean and sanitize.
- Natural disinfectants for cutting boards:
- For a natural disinfectant, mix equal parts white vinegar and water, and spray it onto the cutting board.
- Let it sit for a few minutes before rinsing.
- Another option is to use a diluted bleach solution (1 tablespoon of bleach per gallon of water) to sanitize the cutting board.
Cleaning Shower Curtains
To effectively clean shower curtains as a new homeowner, start by using a gentle detergent and warm water solution.
For fabric curtains, remove the curtains from the hooks and soak them in the solution for about 30 minutes. Gently scrub any stains or mildew using a soft brush. Rinse thoroughly and hang them to dry. To prevent mildew growth, it’s important to dry the curtains properly after each use. Ensure good air circulation in the bathroom by keeping the door or window open.

For plastic shower curtains, wipe them down with a mixture of vinegar and water. This solution helps remove soap scum and prevent mildew. Rinse well and allow them to air dry.
Following these cleaning tips will help keep your shower curtains fresh and clean, giving your bathroom a welcoming and inviting feel.
Removing Soap Scum
To effectively remove soap scum as a new homeowner, start by using a strong cleaning product specifically designed for bathroom surfaces. Here are three essential tips to help you tackle soap scum effectively:
- Preventing Soap Scum Buildup: Regularly wipe down your bathroom surfaces with a squeegee or microfiber cloth after each use to prevent soap scum from accumulating.
- Natural Soap Scum Removers: If you prefer eco-friendly options, try using natural soap scum removers like a mixture of vinegar and water or baking soda paste. These DIY cleaners are effective and safe for your bathroom surfaces.
- Preventing Soap Scum on Glass: To prevent soap scum buildup on glass surfaces, apply a thin layer of rain repellent or automotive wax. This protective barrier will make it easier to clean and prevent soap scum from sticking to the glass.
Cleaning Stainless Steel
To keep your stainless steel surfaces sparkling and free from smudges, regularly wipe them down with a microfiber cloth. Stainless steel appliances and fixtures can add a sleek and modern touch to your home, but they require proper care to maintain their shine and prevent scratches.
To effectively clean stainless steel, avoid using abrasive cleaners or scrubbing pads that could damage the surface. Instead, opt for mild dish soap diluted with warm water or a specialized stainless steel cleaner. Gently scrub the surface in the direction of the grain using a soft cloth or sponge.
For stubborn stains or fingerprints, you can use a mixture of vinegar and water or rubbing alcohol. Remember to always dry the surface thoroughly to prevent water spots. By following these tips, you can keep your stainless steel looking its best and enjoy a clean and polished home.
To help you remember these essential cleaning tips for stainless steel, here’s a handy table:
| Cleaning Method | How to Use |
|---|---|
| Mild dish soap | Dilute with warm water and gently scrub the surface |
| Specialized cleaner | Follow the instructions on the product label |
| Vinegar and water | Mix equal parts and wipe the surface |
| Rubbing alcohol | Apply with a cloth and wipe the surface |
| Microfiber cloth | Regularly wipe down the stainless steel surface |
| Soft cloth or sponge | Gently scrub the surface in the direction of the grain |
With these methods, you can easily remove fingerprints, maintain the shine of your stainless steel, and keep your appliances and fixtures looking brand new.
Vacuuming Under Furniture
Make sure to regularly vacuum under your furniture to keep your home clean and free from dust and debris. Here are three essential tips to help you effectively clean those hard-to-reach areas:
- Use the right attachments: When vacuuming under furniture, use the crevice tool or the brush attachment to reach tight spaces and corners. This will allow you to remove dust and dirt that may have accumulated.
- Move furniture when necessary: It’s important to occasionally move your furniture to clean underneath. This prevents dust buildup and ensures a thorough cleaning. Be cautious when moving heavy furniture to avoid any damage to your floors or back strain.
- Don’t forget about upholstery and carpets: While vacuuming under furniture, take the opportunity to clean upholstery and deep clean carpets. Use an appropriate attachment to remove pet hair, crumbs, and other debris that may have settled on your furniture or carpets.
Cleaning Blinds or Curtains
When cleaning blinds or curtains as a new homeowner, regularly dust them using a microfiber cloth or a duster with an extendable handle to reach high and hard-to-reach areas. Dust can accumulate on blinds and curtains, making them look dull and dirty. To remove dust, simply wipe the surface of the blinds or curtains with a microfiber cloth or a duster.

For a deeper clean, you can also wash blinds or curtains according to the manufacturer’s instructions. Spot cleaning can be done by using a mild detergent and a soft cloth to gently remove any stains or dirt. It’s important to take care of your blinds or curtains to maintain their appearance and prolong their lifespan.
| Cleaning Curtains | Washing Blinds |
|---|---|
| Regularly dust curtains using a microfiber cloth or duster. | Follow manufacturer’s instructions for washing blinds. |
| Spot clean any stains or dirt using a mild detergent. | Use a soft cloth to gently wipe the blinds. |
| Check for any specific care instructions on the curtain label. | Avoid excessive moisture when cleaning blinds. |
| Consider vacuuming curtains using an upholstery attachment. | Dry blinds thoroughly to prevent mold or mildew. |
| Hang curtains back up while slightly damp to avoid excessive wrinkles. | Use a blind cleaner tool for hard-to-reach areas. |
Removing Grease Stains
- Start by applying a small amount of dish soap directly onto the grease stain. Gently rub the soap into the stain using a soft cloth or sponge.
- For tougher grease stains, mix equal parts baking soda and water to create a paste. Apply the paste to the stain and let it sit for 15 minutes before rinsing with warm water.
- If the stain persists, try using a commercial grease stain remover. Look for products specifically designed for grease stains and follow the instructions on the packaging.
Remember, prevention is key to keeping your home free from grease stains. Avoid cooking with excessive oil and use splatter screens while frying. Regularly wipe down surfaces in the kitchen to prevent grease buildup.
In case DIY methods don’t work, consider contacting professional grease stain cleaning services for more stubborn stains. They have the expertise and specialized equipment to effectively remove even the toughest grease stains.
Cleaning Grout Lines
To effectively clean grout lines in your new home, start by using a small amount of bleach mixed with water. This solution helps to reduce grout discoloration and prevent grout mold. However, it is important to choose the right grout cleaner for your specific needs. Here is a table that compares different DIY grout cleaning methods to help you make the best choice:
| DIY Grout Cleaning Methods | Pros | Cons |
|---|---|---|
| Vinegar and Baking Soda | Natural and non-toxic | Less effective on stubborn stains |
| Hydrogen Peroxide and Baking Soda | Effective on tough stains | May lighten colored grout |
| Oxygen Bleach | Powerful cleaner | Can be abrasive on delicate grout |
To maintain grout longevity, it is recommended to clean regularly and avoid harsh scrubbing. Remember, clean and well-maintained grout contributes to the overall cleanliness and aesthetics of your home.
Dusting Ceiling Fans

To keep your new home clean and free from dust, it’s important to regularly dust the ceiling fans. Ceiling fans can accumulate a significant amount of dust and dirt over time, especially if you have high ceilings.
Here are some cleaning tips for ceiling fans:
- Use a long-handled duster or a microfiber cloth to gently remove dust from the fan blades. Start from the outer edges and work your way towards the center. Be careful not to push the dust onto the surrounding surfaces.
- To prevent dust buildup on ceiling fans, consider using a fan cover or a blade cover. These covers can help trap dust and make cleaning easier and less frequent.
- Don’t forget to clean the ceiling fan light fixtures as well. Dust can accumulate on the light bulbs and covers, affecting the brightness and appearance of the room. Use a soft cloth or a duster to wipe away the dust and keep the lights shining bright.
Cleaning Air Vents
Clean your air vents regularly to maintain optimal air quality in your new home. Vent maintenance is essential for improving air quality and preventing dust buildup. Over time, air vents can accumulate dust, dirt, and other allergens, which can negatively impact the air you breathe.
To prevent this, make sure to clean your air vents at least once every three months. Start by removing the vent covers and using a vacuum cleaner to remove any loose debris. Then, wipe down the vent covers with a damp cloth to remove any remaining dust.
Choosing the right air filter for your HVAC system can help trap more particles and improve air quality. If you’re unsure about cleaning your air vents yourself, consider hiring professional vent cleaning services to ensure a thorough and effective cleaning.
Removing Water Stains

For effective removal of water stains in your new home, start by using a specialized cleaner designed to tackle these stubborn marks. These cleaners are specifically formulated to break down and dissolve hard water stains, making the removal process much easier.
However, if you prefer a more natural approach, there are several DIY stain removal methods you can try. One option is to mix equal parts white vinegar and water and apply it to the stained area. Let it sit for a few minutes, then scrub it with a brush or sponge.
Another natural stain remover is baking soda. Create a paste by mixing baking soda with water and applying it to the stain. Allow it to sit for a while before scrubbing away.
If the stains are particularly tough or extensive, it may be best to seek professional stain removal services.
Cleaning Baseboards and Moldings
When cleaning your new home, it’s important to pay attention to the often overlooked areas, such as baseboards and moldings, which can accumulate dust and dirt over time.

Start by dusting the baseboards with a microfiber cloth or a soft brush to remove any loose debris. For stubborn scuff marks, use a melamine foam eraser or a mixture of baking soda and water to gently scrub the affected area.
To polish and protect the woodwork, apply a wood cleaner or a mixture of vinegar and water using a soft cloth. Be sure to dry the baseboards thoroughly to prevent mold growth.
Clean the crown molding with a damp cloth or a soft brush to remove any dust or dirt. Taking the time to clean these areas will help maintain the overall cleanliness and appearance of your home.
Cleaning Tile Grout
By scrubbing with a toothbrush and a mixture of baking soda and water, you can effectively clean tile grout in your new home. Here are three essential tips for cleaning tile grout:
- Re-grouting techniques: If your grout lines are severely stained or damaged, consider re-grouting them. This involves removing the old grout and applying new grout to ensure a fresh and clean appearance.
- Natural grout cleaners: Instead of using harsh chemical cleaners, opt for natural alternatives. Mix equal parts of vinegar and water, or lemon juice and baking soda, to create a gentle yet effective grout cleaner.
- Preventing grout discoloration: To maintain the color of your grout lines, avoid using bleach or abrasive cleaners. Regularly wipe down the grout after showering or cooking to remove any dirt or stains before they become deeply embedded.
Removing Fingerprints
To effectively remove fingerprints from surfaces in your new home, simply wipe them away using a microfiber cloth and a gentle cleaning solution. Fingerprints can make your surfaces look smudged and dirty, so it’s important to keep them clean to maintain a spotless appearance.

When cleaning glass surfaces, such as windows or mirrors, use a glass cleaner specifically designed to remove fingerprints and leave a streak-free shine.
To prevent fingerprints from appearing on surfaces, consider using fingerprint-resistant coatings or regularly wiping down high-touch areas. When choosing the right cleaning products, opt for those that are specifically formulated to remove fingerprints without damaging the surface.
Cleaning Hardwood Floors
To effectively clean hardwood floors in your new home, you should use a soft microfiber mop and a specially formulated cleaning solution. Here are some essential tips to help you maintain the beauty of your hardwood floors:
- Choose the best cleaning solution: Look for a pH-neutral cleaner specifically designed for hardwood floors. Avoid using harsh chemicals or oil-based cleaners, as they can leave residue and dull the finish.
- Prevent scratches: Place doormats at entrances to trap dirt and debris from shoes. Use felt pads on furniture legs to prevent scratches when moving them. Avoid dragging heavy objects across the floor.
- Maintain shine: Regularly sweep or vacuum your hardwood floors to remove dirt and dust. Use the microfiber mop and cleaning solution to gently clean the surface. Avoid excess water, as it can damage the wood. Dry the floor thoroughly after cleaning to prevent water spots.
Cleaning Showerheads
To effectively clean your showerhead, use a strong descaling solution. Over time, mineral deposits can build up on the showerhead, causing it to become clogged and reducing water flow.
To remove these deposits, create a vinegar solution by mixing equal parts water and white vinegar. Fill a plastic bag with the solution and secure it around the showerhead, making sure it’s fully immersed. Leave it on for a few hours or overnight, then remove the bag and scrub the showerhead with a toothbrush to remove any remaining residue.
If your showerhead is old and beyond cleaning, consider replacing it with a new one for better water pressure and efficiency. To prevent mold buildup, make sure to clean your showerhead regularly and keep your bathroom well-ventilated.
Disinfecting Kitchen Surfaces
To effectively disinfect your kitchen surfaces, start by wiping down countertops and other frequently touched areas with a solution of bleach and water. This will help eliminate germs and keep your cooking surfaces germ-free.
Here are three essential kitchen disinfecting tips to ensure proper kitchen hygiene:
- Sanitizing cutting boards: Cutting boards can harbor bacteria from raw meats and vegetables. To sanitize them, wash them with hot, soapy water and then rinse with a solution of one tablespoon of bleach mixed with one gallon of water. Allow them to air dry before using them again.
- Countertop cleaning techniques: Use a disinfectant spray or wipes specifically designed for kitchen surfaces to clean your countertops regularly. Pay extra attention to areas where food is prepared and served, such as around the sink and stove.
- Germ-free cooking surfaces: Clean and disinfect your cooking surfaces, including stovetops, ovens, and microwaves, regularly to prevent the spread of bacteria. Follow the manufacturer’s instructions for cleaning and use appropriate disinfectants to ensure a germ-free cooking environment.
Conclusion
In the journey of homeownership, cleanliness holds the key to a harmonious and inviting living space. By following these essential cleaning tips, you can ensure a sparkling home that radiates warmth and comfort.
Like a symphony conductor orchestrating every note, let your cleaning routine harmonize with your daily life. With diligence and these practical strategies, your new home will be a sanctuary where happiness thrives and memories are made.

So grab your cleaning tools and let the magic of a clean home begin!